


How to Use the Godox V1 Flash: a Comprehensive Guide
- Toby Hicks

- May 5
- 6 min read

Flash photography can feel intimidating when you're first starting out, but with the right tools and a little guidance, it becomes one of the most powerful ways to elevate your images. Over the past five years we have exclusively used Godox flashes for all of our lighting needs. We've come to love their flexibility, reliability, and ease of use, particularly the Godox V1, a compact, round-head flash packed with features for both on-camera and off-camera setups.
Whether you’re brand new to flash or looking to sharpen your skills, this guide breaks down everything you need to know.
Why We’ve Trusted Godox for 5+ Years
After years of shooting weddings, branding sessions, and commercial work, we've put our gear through real-world demands. Godox has consistently proven to be an incredibly effective tool at a very reasonable price point.
While in the past Godox has had issues with its hot shoe mount being made of plastic and breaking, one of the biggest advantages is how easy Godox gear is to repair. Replacement parts such as hot shoes are inexpensive and widely available, and many repairs can be DIY with just a screwdriver. This keeps your gear working longer and cuts down on service costs. In recent years Godox has upgraded their hot shoes to be made out of metal and I have not had to replace a single hot shoe in over 2 years now.
Where to Start with Flash Photography
While setting up any shot using additional lighting, I always start by having the flash turned off and setting my exposure for the ambient light in the room. Unless you plan on doing shutter drag, set your shutter speed to 1/250 and leave it there. If you are shooting in a dimly-lit room such as a wedding dance floor, you may not want to start off at ISO 100 since you would make everything not being hit by a flash completely dark. Bring up the ISO until you are accurately portraying the vibe of a room, this is purely to taste so experiment and find what you like best. From this point you can turn on your Godox V1 and your camera's live view should change to a more neutral exposure, this is why you set ambient exposure BEFORE turning on the flash.
Understanding TTL: Pretty Much Flash on Auto Settings

If you’re new to flash, TTL (Through The Lens) may quickly become your best friend.
TTL automatically measures the scene through your camera’s metering system and adjusts flash power in real time. This mode is especially helpful for:
Fast-moving environments
Weddings or events with changing lighting
Run-and-gun portrait sessions
Instead of constantly adjusting your power manually, your V1 will calculate the correct output for each shot, letting you focus more on composition and timing.
While TTL will allow you to get reasonably good exposure consistently, it comes with the added drawback of making your strobe fire two times in quick succession, one flash for metering and the second for the exposure of the image. This leads to a quicker depletion of the battery than if you were shooting with manual power.
To have your Godox V1 shooting in TTL mode, press the bottom of the circular dial (it's labeled MODE) in the center of the strobe until the top left of the LCD screen reads "TTL". By default TTL will try to find 0EV exposure, however if you wish to have something darker and moodier you can adjust this setting by clicking left on the circular dial (labeled "+/-") and rotating the circular dial, which adjusts the intensity of the strobe by 1/3 stop, giving you more control of its output.
What does TCM mean?
TCM stands for TTL Converted to Manual which converts whatever your strobe's most recent TTL exposure was to a manual power. You would want to use this if you were happy with the exposure that TTL had provided and wanted to maintain it while keeping a consistent distance from your subject. On a Godox V1, you would activate this setting by pressing the top left button that is labeled "TCM" on the LCD screen. If you want to quickly revert to TTL mode to reset simply press the TCM button again.
How to Set Manual Power on the Godox V1

While TTL is powerful, manual mode gives you full creative control, especially in controlled environments like studio sessions or staged portraits.
Here’s how to set manual exposure on your V1:
Turn on the flash and press the MODE button until you see M on the display.
Use the +/- button on the dial to adjust the flash output.
The number for the power of your flash will be highlighted with a gray box to indicate that you can change the number.
Flash power ranges from 1/1 (full power) to 1/256 (minimum), in 1/10-stop increments.
Adjust based on your exposure settings; aperture and ISO most directly affect how much flash appears in your shot.
As a general rule of thumb, I like to start my flash at 1/32 power. This intensity sits right in the middle of what your flash can do so you know that if your image is too dark you can take the shot again with more power and if it's too bright you can lower the power.
Using Your Godox V1 Flash as a Wireless Remote for Off-Camera Flash
One of the strengths of the Godox system is its unified 2.4GHz wireless platform. Your V1 isn’t just an on-camera flash, it can also double as a remote transmitter to control your other Godox strobes. When we first started using off-camera lighting, this was incredibly helpful so that we didn't need to go out and buy triggers immediately!
To set the V1 up for wireless shooting:
Hit the menu button
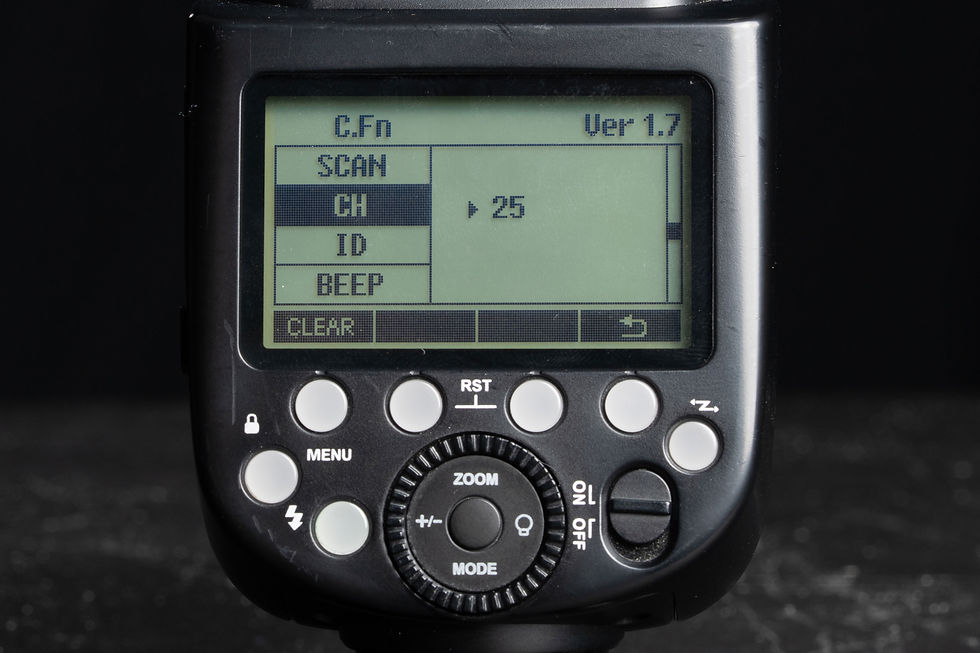
Scroll down to the second page and select CH
Rotate until you have a channel number assigned to your flash
All flashes that you wish to use wirelessly should all be set to the same channel
I advise never to use channel 1 as you could run into signal interference if other vendors use Godox flashes in their setups
If your flash is experiencing interference, use the scan option in the menu to find a list of less congested channels to switch your flashes to.
Scroll down to ID
Set the ID to anything other than "off"
All flashes that you wish to use wirelessly should all be set to the same ID
To use the V1 as a trigger:

Press the button on the far right side of the flash (it has a zig zag emblem) until your flash displays the wireless shooting screen
Assign your flashes to groups (A, B, C, etc.).
Group M (as seen in the above photo) allows you to control the V1 allowing you to light with direct lighting while still triggering off-camera lighting.
Set the channel (CH) to match your off-camera lighting. If the strobe you wish to use is channel C, press the C button to cycle through all of the shooting modes (Manual or TTL). While the channel is highlighted you can adjust your exposure the same way that you would your V1
Use the V1’s control dial to adjust power, TTL, or mode for each group.
Your V1 will now fire and control all compatible Godox lights, AD200, AD600, V860, and more.
This lets you run full lighting setups without needing a dedicated trigger like the Godox XPro or Godox X3.
Fun Tricks with the Modeling Light
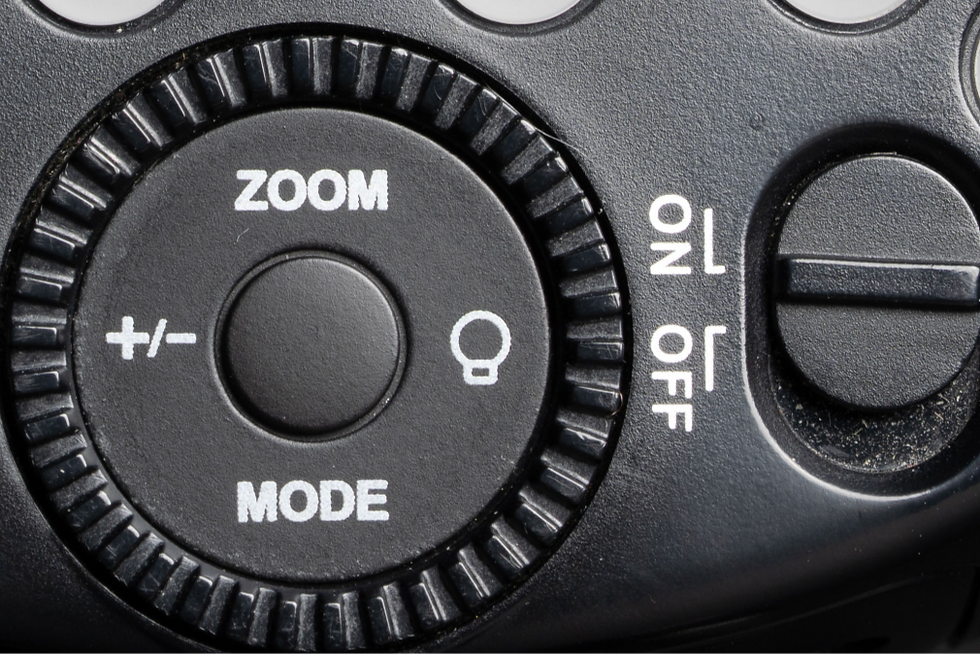
Most flashes come with a modeling light, or a light that you can use to help you better understand how your light will hit your subject. To use the modeling light on your Godox V1 simply press the betton on the circular dial that looks like a light bulb and then hit the center button of the dial to turn it on or off. You can set the power from 0-10. In my own experience this isn't super useful as a modeling light for portraits but the real strength comes when you take it off of your camera and use it like a flashlight.
Raise it high and point it at the cake during a wedding reception to help create dramatic light in an otherwise-dim room. Help a videographer get sparkle out of a diamond by moving it around. There are a huge number of ways to use the modeling light, play around with it, it's more powerful than you would expect.
Final Thoughts
Flash doesn’t have to be confusing or overwhelming. The Godox V1 makes it simple to jump into both on-camera and off-camera lighting. With its intuitive controls and wireless capabilities, it’s one of the most versatile tools a photographer can carry.
Whether you're lighting portraits, events, or commercial work, learning how to use your Godox V1 flash will open up creative possibilities that natural light alone can’t match.
If you would like to have hands-on training on flash photography, shooting, or editing we offer mentorship packages to suit a variety of needs. Inquire at www.HardestyPhotoandFilm.com/mentorships for more information.

